Hack Rays - SnapPower Guide Light Switch
A friend of mine has a company that makes night lights and power charges which are very easy to install as the wall plate around existing power outlets so that they do not take up one of the plugs. That is rather convenient, but I keep telling him there should be an on/off switch. He gets lots of feedback and can only work so fast.
We have this light in my daughter's room (now almost 7 months old) and at some point we decided that she wasn't sleeping too well with the extra bright light. Since there was no way to turn it off I had to completely uninstall it. Fortunately that is very simple to do, but I didn't like that I had to. Therefore, I took it upon myself to add the missing on/off switch.
Supplies
- 1 SnapPower guide light (originally called "SnapRays")
- 1 uxcell 2 position 1P2T SPDT Mini Panel Slide Switch SS12F1-G3 from Amazon. Sold in a 50 pack, so I have lots of spares. :-)
Equipment
- Screwdriver, flathead
- Wire cutters
- Wire strippers (20 gauge)
- Pliers
- Drill
- 1 narrow drill bit and 1 less narrow
- Clamps
- Saw horse
- Razor
- Pencil
- Soldering iron and solder
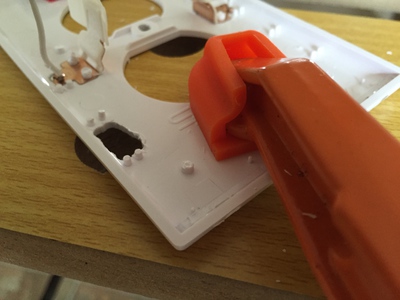
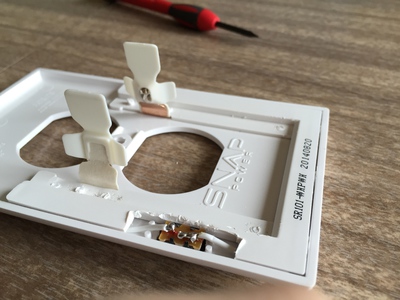
Step 1 - Open Seasame
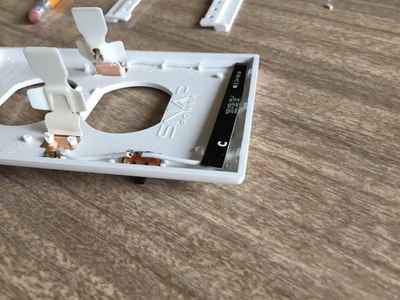
Turn the guide light over and you see a backing that covers up the wires and the light circuitry at the bottom. There are round plastic fasteners with tabs on the tops that hold this in. Unfortunately you have to break those tabs off, then you can pry this backing up with a flathead screwdriver.

Pull the back off and slide the circuits out of the bottom.

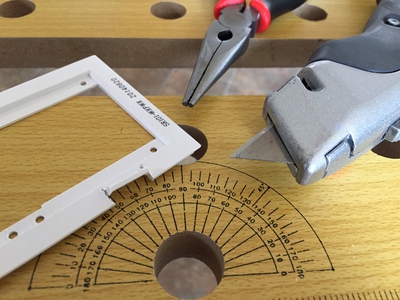
Step 2 - Make a Hole
Start by drawing the rectangle to cut out by tracing around the switch on the back of the plate. Then clamp this down to a saw horse so you can safely drill through it. You want sufficient support on the plastic so that you won't crack it either.
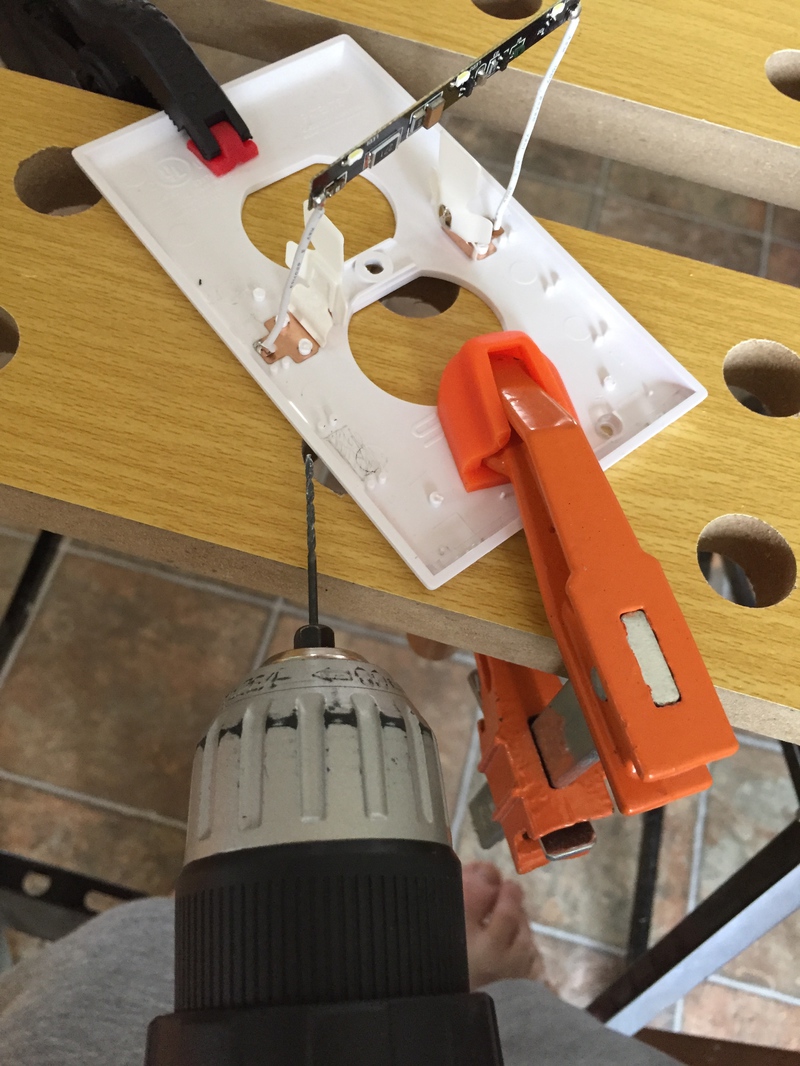
I started with the narrowest drill bit in my collection and made several holes in the marked region. Then I moved to a larger drill bit to expand and connect the holes. Finally, I kept the drill running and moved it up and down and side-to-side along the plastic edges to expand and smooth out the hole.

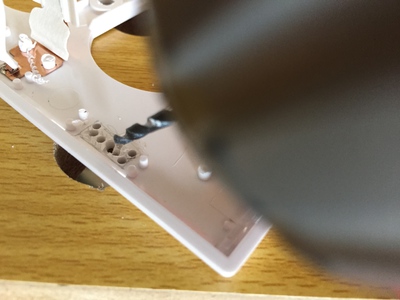
Now the switch fits in.

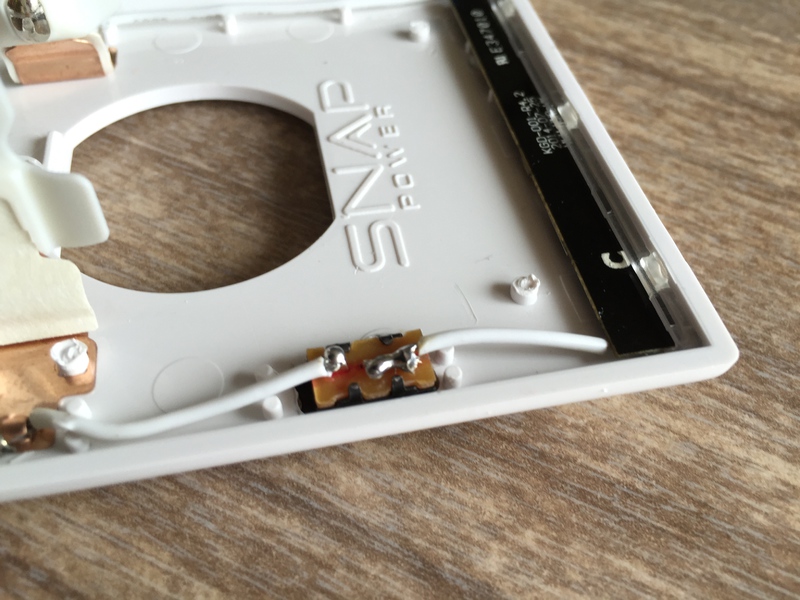
Step 3 - Wiring
Now cut the wire right where the switch will go, strip the ends, and bend them into the switch's prongs. Using the middle prong made the wire a bit too short for the lights to fit back where they belong, but this is a 2-way switch and I only need it to be an on/off switch so I connected it to the bottom and just soldered the bottom and middle together to complete the circuit. Bend over the tabs before soldering to make the end product a bit slimmer.

Step 4 - Restore the Backing
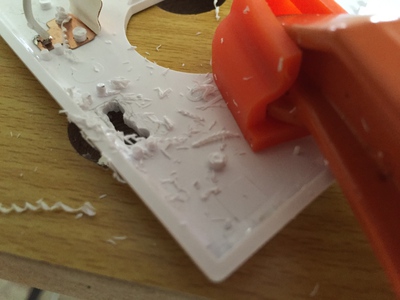
The plastic backing doesn't quite fit over the switch. So I marked the area and cut it out with a razor, making slices for the sides and using pliers to bend up the plastic to remove and break it off. Then I was able to get the backing back on. Push it so the remainder of the plastic pegs go into the holes and push down around those with the end of the pliers to make sure it is in there snugly.
On the front, I used a bit of wood filler and wood glue to fill in some of the extra space in the hole I cut out. I'm sure there's something better to use for this, but that is what I had handy. I could probably also paint the switch white to match better if I had the right kind of paint but I don't. So this isn't the prettiest job, but it is functional.
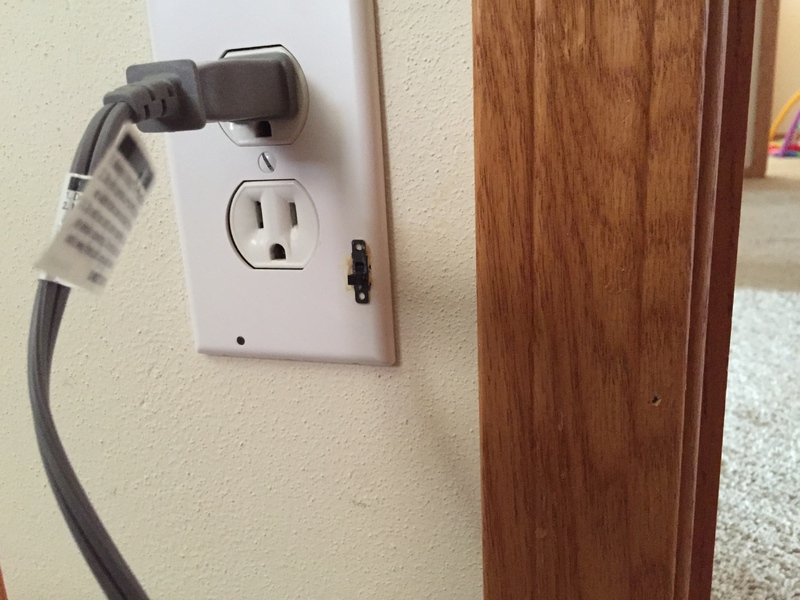
Step 5 - Install in Wall
Now screw it back into the wall and voila. It still uses its light sensor to turn itself on automatically, but only when my new switch is in on mode.
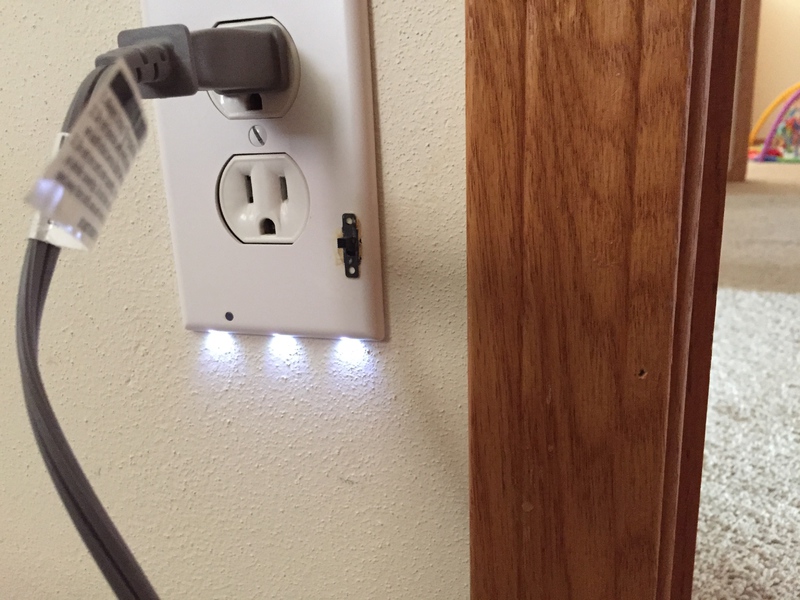
We'll see if this stands up to the real test when our little 7-month-old starts crawling around more on her own and touching everything. For now, we can get light when we want it but turn it off to let her sleep.