Let There Be Visuals
Really this was a year ago, I'm so slow to update my blog. But I added support for images! Did you notice?
I am using my own hand-built blogging engine. I wrote about this at the time in "I Yack About My Blog". It is similar to Jekyll in concept, using Git and designed to be programmer-friendly. I use Markdown and a friendly text editor for all the content, run my publish script, and push the changes to my server.
But how do I include images? One way is to allow HTML tags inside the Markdown, then upload images to a public folder and reference them. But there are a few problems with this:
- It is hard to preview locally. The paths on my development desktop are not the same on my published blog. This in in part by design, to make sure I've caught all the bugs from absolute or relative paths. But embedded HTML in Markdown cannot invoke my engine's URL canonicalization function.
- I want fancy Lightbox overlays, but I do not want to write (or copy/paste) the HTML and Javascript for that into every blog post for every image.
- I want image previews, but I do not want to manually resize all my images.
I built the blog from scratch, so let's add my own image handling too.
Custom Image Tags
I chose to add my own custom tag format on top of Markdown, which would be converted to HTML before running the Markdown to HTML conversion. Using a state machine (I love making those for some reason) I parse out tags in my syntax and handle each one. Only an IMG tag is handled at present.
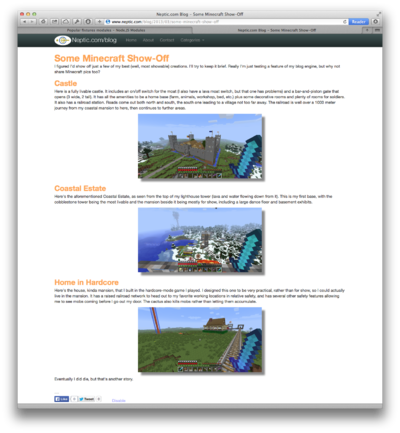
Here's an example, for the image I embedded above:
[IMG: neptic-blog-with-pictures.png; preview-width=400 width=800 lightbox frame=center title="Neptic/blog showing off pictures"]
This enables Lightbox, sets the border style, and adds a caption. It also specifies a preview-width which triggers resizing for a thumbnail. Furthermore, it specifies width which will resize the image shown in Lightbox too, since my source images are often quite large.
You can guess how I resize them, right? Imagick, what else? I installed the php54-imagick extension via Homebrew. Homebrew installed it's own copy of php, so I can use Imagick by sourcing a script that adds Homebrew's PHP to the path ahead of Mavericks's PHP (Mountain Lion at the time, but I've since upgraded). But I got tired of that and added the extension to /etc/php.ini. Apparently Mavericks does not have a php.ini by default, just an example. I figured all the current working defaults are fine with me so I made a file with just the one extension:
; Enabling Imagick extension, installed via Homebrew
[imagick]
extension="/usr/local/opt/php54-imagick/imagick.so"
What goes in Git? I don't want the huge source images, just the resized ones. So I have a articles/source-images directory that is ignored by Git and all the committed images are in articles/images (which is linked into the public folder).
I also don't need Imagick on my server since all the resizing gets done on my development machine when I'm previewing the article. So the publish script checks class_exists("Imagick") first. If that class is not available it will only verify that the resized images are present. Otherwise it will find them and the source image, if missing generate them, if present verify their sizes (and regenerate them if wrong).
Ironically I had to modify my custom tag parser for this article to ignore tags inside quoted code blocks:
if( $i >= 3 && trim(substr($line,0,$i)) == "" ) break; //indented 3+ spaces means quoting a code block.
Publishing an article
The process of publishing an article is now as follows. First, create a new one from a template:
./scripts/generate article -e "Let There Be Visuals"
Then edit the template to narrow down the categories, fill in metadata (or just delete the optional lines), copy-paste-modify for images, and type the contents.
# Let There Be Visuals

This is an interesting article.

[IMG: image.png; preview-width=400 width=800 lightbox frame=shadow title="Look"]

Category: minecraft, politics, programming, replies, sci-fi, techworld
keywords: let,there,be,visuals
description: an interesting article (optional)
author: me (optional)
title: Let There Be Visuals (optional override)
date: 2014-02-08
Next, test publish with this:
./scripts/post.php -p articles/2014-02-08-let-there-be-visuals.md
The -p is for "Preview" and opens the new HTML file in Safari. Passing -f will force a regenerate after edits (to avoid overwriting generated articles in production).
Then Git add, Git push, ssh into server, git merge master (I keep the deployed web app on it's own local branch), and run the publish script for real.
 Neptic.com/blog